Saturday, March 28, 2020

Duff-up In John's Shed: The Austrian's First Outing


Things start to go wrong on the Austrian right- the line is in the process of being shot to bits
I slipped up to Cambridge to John's shed for the day in order to get the Austrians actually on a table for the first time. There wasn't a massive amount of thought put into the game, it was just a bit of an excuse for a duff-up. John is easing his way back into Napoleonics after a lengthy lay-off so we wanted just a quick, low intensity game that wasn't going to tax the brain an awful lot.
Close up of the attack columns on the left. Everything fine at present (sausage roll in support)
It was a pretty straightforwards set-up, a village complex on the (Austrian) right, some skirmish buildings and walls on the left,  a few woods in the centre. No big artillery platforms anywhere, French defending. We didn't have a huge amount of time so the French deployed quite far forwards,which didn't help the Austrian cause much. In retrospect we probably could have been a bit cleverer with the terrain, 
Panorama of the early stages
The only decent area for cavalry was in the centre which unbalanced things somewhat. I concentrated the Austrian's new shiny hussar brigade there and the French had a regt each of Chassuers, dragoons and cuirraisier plus a horse btty.  Each flank had an infantry division to take the respective village areas. The one on the right had a dragoon regt attached.
We used a variable morale system for the infantry, all btns were treated as 1st class line until they took their first morale test,where-upon they rolled to discover their true class: Austrians: 1 to 3- 2nd class line. 4 to 10 1st class line.
French: 1 to 4 -2nd class line 5 to 7 1st class line, 8 to 10, veteran.
French young guard: 1 to 5, veteran. 6 to 10 Elite.
All cavalry was line and all artillery was 1st class.  
The Austrians fielded 1 infantry division of 2 Grenzer, 5 line btns with a 6lb btty and 18 skirmishers, these took the left flank. In the centre was a hussar brigade with 14 squadrons of hussars each of 6 figures.
On the right was an infantry division of 6 line btns with a dragroon rgt of 6 x 6 man squadrons plus a 6lb btty and 12 skirmishers. All btns were 48 man strong. 
5 battalions: should be enough to take a village, surely?

Connoissuer French attempt to outflank the Austrian left
The French had a 2 infantry divisions each of 6 x 36 supported by a 6lb btty, 24 chassuers and 18 skirmishers. One of each occupied each flank.
In addition they had a young guard division of 4 x32's plus a heavy cavalry outfit with 1 x 32 of dragoons and 32 cuirraisier with a 3 gun horse btty.
All in all, I think the French were too tough for the poor old milkshakes.
The Austrian right develops
The Austrians trundled forwards, because of the speed of our set-up it meant the Austrians couldn't really get any artillery preparation, however they manfully pitched into the attack against each village. They actually did ok, they got forwards,got the guns into position and started to work  towards their objectives.
In the centre the massed hussars nullified the french cavalry, a typical ding-dong Grand Manner cavalry scrap continued through the whole game.  A lot of folk can't cope with the cavalry system in ITGM but the more I read of historical accounts the more they turn out like ITGM battles. Units go forwards, battle it out, retire, new ones go in, the original ones rally, go back. Its all about having local reserves. Both sides (typicaly) won the combats they should have lost, and lost the ones they "were certain" to win. The rest of the cavalry was squeezed on the extreme Austrian right, and this went a bit more to the script, with the Austrian dragoons making short work of a chassuer regt, which forced a couple of French btns into square and took them out of the fight for the village. 
A recent new acquisition: Classic Connoissuer infantry painted by Doug Mason, skulking in square.
On the left a grenzer btn waddled in line through a wood on the the extreme flank, it never got anywhere for the whole game but it did tie down 2 French btns (a bit) so it wasn't a total waste of time.
Meanwhile the asault against the skirmisher buildings and the walled compound went in. John concentrated a lot of fire on one unit (always a mistake in my book) but the size of the Austrian units allowed it to be shrugged off. I had some success at first and things were looking rosy.
6lb battery supporting the Austrian right
The French artillery btty retreated when charged and the lead 2 Austrian units crunched into a lone French btn manning the wall. In fact I had a bit too much success. The French btn routed after the first round of combat, with relatively light casualties. I would have much preferred for it to have stuck around for at least a second round of combat as I had 2 more btns to re-inforce with and the French had one. This would have allowed me to ruin 2 French units, as it was it meant the French just pulled back a bit, I couldn't exploit, and the 2 units I had in the front line were badly shot up. They took more and more fire from the flanks and that was about it for my attack on the left village.
Hussars and Grenzer demonstrate in the centre
The right hand flank told a similar story, despite the dragoon's success I couldn't get sufficient  force to bear on the village, I was reasonably successful at clearing the walls but couldn't find room to deploy those big Austrian firing lines. When I finally did, it being Austrian, it took so long to deploy that it was shot down before it could do much damage. Again, the Austrians after initial successes just couldn't finish off those Frenchies.
High point for the left. The Austrians couldn't get over that wall.
Things were coming to close, dinnertime was approaching, and the Austrians had run out of steam. We called it a day.
So in the end it was a suitably inauspicious start for the Austrian army, but then, as we all know, all troops get beat the first time out!
(Good Lord!! I've just noticed...60,000 hits!!- does that mean I can have drink?)

Free Web Site Counter

2019 Summer Innovation Program @ MassDiGi


The 2019 MassDiGI Summer Innovation Program (SIP) is a twelve-week internship program that includes the mentoring, guidance, housing, stipends and game development tools to help student teams finalize an original digital game and prepare it for launch.
  • A chance to work on a game prototype from the ground up
  • Work with a team of students to help create the next big hit
  • Industry mentors to help guide you
  • A free place to live and a stipend
This is not just another internship but a chance to hold the fate of a game in your hands.  There are industry mentors and faculty to help you – but in the end it is up to your team to build a successful game.
  • Update: The 2019 SIP application period is now open. Click here to apply. 
  • The application period will close March 20, 2019 at 11:59 pm ET. Successful applicants will be informed on or before March 31, 2019 at 11:59 pm ET.
  • SIP19 runs from May 14 to August 11, 2019. Please read the FAQ's before applying. 

Ep 34: Top Faves With Dave Goes Digital Is Live!

Ep 34: Top Faves with Dave goes digital

https://soundcloud.com/user-989538417/ep-34-top-faves-with-dave-goes-digital

Dave Tubbs, Nick Nerthery and I talk about military-themed video games.

Join the conversation at https://theveteranwargamer.blogspot.com, email theveteranwargamer@gmail.com, Twitter @veteranwargamer

Follow Dave on Twitter! @FrmrSldrFgtPlyr

Try Audible for your free audiobook credit by going to http://audibletrial.com/tvwg

New Segment - Stump Jay! Dave's attempt to stump Jay took 308 milliseconds to solve.
Maori Wars Empress Miniatures - http://www.empressminiatures.com/page11.htm

Emu Wars Eureka Miniatures - http://www.eurekamin.com.au/product_info.php?cPath=131&products_id=13353

SCW Empress - http://www.empressminiatures.com/page9.htm

Top Faves
Myth: The Fallen Lords - http://projectmagma.net/what/
Gog - https://www.gog.com/
Wolfenstein 3D - http://3d.wolfenstein.com/game_NA.php
Starcraft: Brood War - https://starcraft.com/en-us/
War Thunder - https://warthunder.com/en
Wolfpack - https://www.emuparadise.me/Abandonware_Games/WolfPack_(1990)(NovaLogic)/95670
UBoot Kickstarter - https://www.kickstarter.com/projects/phalanxgames/uboot-the-board-game
Captain Sonar - https://www.asmodee.us/en/games/captain-sonar/
Red November - https://www.fantasyflightgames.com/en/products/red-november/
Close Combat: A Bridge Too Far - https://www.gog.com/promo/20180206_launch_promo_close_combat
Ghost Recon: Advanced Warfighter - https://www.gamestop.com/xbox-360/games/ghost-recon-advanced-warfighter/39276
Axis & Allies CD - http://www.harrisgamedesign.com/phpBB3/viewtopic.php?t=2268
Company of Heroes -  http://www.companyofheroes.com/
Dawn of War - https://www.dawnofwar.com/
Halo - https://www.halowaypoint.com/en-us
Halo Fleet Battles - https://boardgamegeek.com/boardgame/176936/halo-fleet-battles-fall-reach
Diplomacy Play By Email - http://www.playdiplomacy.com/
Junta - https://www.alderacsite.com/junta/
Call of Duty: World at War - http://store.steampowered.com/app/10090/Call_of_Duty_World_at_War/
Total War - https://www.totalwar.com/
Brothers In Arms: Hell's Highway - http://store.steampowered.com/app/15390/Brothers_in_Arms_Hells_Highway/
Nick's Article - http://www.offdutygamers.com/2010/01/brothers-in-arms-hell%E2%80%99s-highway-good-enough-to-be-a-training-aid/

Music courtesy bensound.com. Recorded with zencastr.com. Edited with Audacity. Make your town beautiful; get a haircut.

Monday, March 23, 2020

The Alliance Alive HD Remastered Review (Steam)

Written by Alexander O. Cuaycong and Anthony L. Cuaycong


Title: The Alliance Alive HD Remastered
Developer: FURYU Corporation
Publisher: NIS America, Inc.
Genre: RPG
Price: $39.99
Also Available On: PS4Switch


Japanese role playing games have come so far from their once-humble beginnings. The early releases struggled to gain a foothold in the West, but subsequent offerings from such franchises as Final Fantasy 7, Fire Emblem, and Dragon Quest managed to find homes in the hearts of gamers. Intellectual properties like these have reinvented the genre, however slowly, and their success underscores the core tenets of timeless examples: proper emphasis on deep stories, interesting gameplay mechanics, and immensely likable characters.


The Alliance Alive is one such example. First making its mark in 2017 as a Japan-only release on the Nintendo 3DS, Atlus USA saw fit to bring it to other regions the year after. Stripped to basics, it aimed to evoke feelings of nostalgia in gamers, with simple graphics paying homage to the finest RPGs of yore. Compared to the more complex battle systems of contemporary competitors, it focused less on flair and doubled down on the lure and allure of its interface, allowing everyone from veterans to newcomers of the genre alike to enjoy its open-world setting, its smooth combat sections, and its overarching narrative of wonder and fantasy, of struggle, loss, and heroism.

Considering The Alliance Alive's strengths, NIS America's decision to port over a remastered version to the Nintendo Switch, the Sony PlayStation 4, and the personal computer comes as no surprise. With an intended goal of presenting an experience that hews as closely to the original as possible, the remaster introduces the title to gamers on latest-generation platforms. They are presented with varying perspectives: from the vantage points of diverse characters, they must piece together the story of the world around them, of the daemons who rule the world, and of the humans who bear the yoke of servitude. By exploring the vast overworld and traveling from town to town, they are compelled to hone their skills in battle and prepare for the inevitable confrontation against the real enemy that hides in the shadows.


Even at a glance, The Alliance Alive HD Remastered presents itself as more than just another run-of-the-mill JRPG title. It begins with the invasion of daemons fearful of the Chaos energy in the human realm. The occupation triggers the Dark Current, which effectively separates the world's four regions. Barely surviving the cataclysm, mankind finds itself divided and subsisting under the reign of daemonic overlords. The gameplay picks up a millennium hence, focusing on nine otherwise-disparate members of the Night Crows, a rebel force out to gain freedom for the human race. And "disparate" may be too conservative a word to describe the nine given their origins and ideologies; joining Galil, Azura, Renzo, Tiggy, Gene, and Rachel in looking after their own are daemons Vivian and Ignace and beastfolk Barbarosa.

In terms of look and feel, The Alliance Alive HD Remastered is much improved over those of the 3DS version; it sports vibrant colors, richer textures, and a much higher resolution that allow the "solid" watercolor art style of old hand Masayo Asano — who boasts of efforts in SaGa and The Legend of Zelda titles — to shine through. Certainly, it casts the narrative penned by Suikoden series creator Yoshitaka Murayama in superior light, a development that, under Masataka Matsuura's steady direction, cannot be overemphasized.


That said, The Alliance Alive HD Remastered distinguishes itself in its gameplay. Unlike other contemporary offerings in the genre, it puts a greater emphasis on tactics and skills, with the biggest influences on combat being how comfortable characters are with their equipment. While a character may use any weapon of their choosing, the skills and attacks they use depend on their mastery over it. Anyone can use a spear, or a sword, or a staff, but the abilities they have, from devastating Area-of-Effect slashes to more precise stabs, are contingent on their familiarity and proficiency with their combat gear.

Parenthetically, The Alliance Alive HD Remastered brings much-needed depth to the battle system, requiring gamers to strategize properly and distribute their equipment judiciously according to the characters' distinct preferences. It's less about stat points, and more about honing skills. Alongside combat formations, this particular facet eventually shapes much of the game, with characters slowly training to become better in certain weapon types, and then unlocking more and better skills over time. It provides a unique sense of progression, and when coupled with the story's semi-brisk pace, makes it enjoyable to run through.


For the most part, The Alliance Alive HD Remastered boasts of intuitive mechanics. At the same time, it presents challenges that tend to be easy. It likewise lacks keyboard support on the PC, forcing users to play with a controller; it's not a huge issue per se, particularly since there is no delay in feedback, but it does limit options. Moreover, framerate issues seem to randomly pop up every now and then. Nothing earth-shaking, really, and nothing an update patch here and there can't fix so that it runs as well as it should.


On the whole, Alliance Alive HD Remastered is a great game to play, but the relative lack of difficulty and absence of controller support can be a huge turn-off for people looking for a challenging, if fair, JRPG. Nonetheless, it earns major props for its earnest gameplay and interesting storylines. It might not be the polished AAA JRPG offering gamers invariably look for, but it's a nice look back to the genre's golden years, and its unique take ensures some 40-odd hours worth of enjoyment.


THE GOOD:
  • Interesting story
  • Unique combat mechanics
  • Diverse set of characters

THE BAD
  • Lack of keyboard support
  • Framerate issues
  • Lack of a true difficulty curve


RATING: 8.5/10

Friday, March 20, 2020

Exploring Monster Taming Mechanics In Final Fantasy XIII-2

Let's just get this out of the way. I'm a huge Final Fantasy fan. I adore the original game even today, Final Fantasy VI is definitely the best of the franchise, and I've found things to enjoy in every one that I've played, which is nearly all of the main-line games. (I still haven't managed to crack open FFIII, but I plan to soon.) Even each of the games in the Final Fantasy XIII trilogy had something that drew me in and kept me going through the game, wanting to learn more. These games get a lot of flack for being sub-par installments in the Final Fantasy franchise, and some of the criticism is warranted. The story is convoluted, and the plot is as confusing as quantum mechanics.

That debate, however, is not why we're here now. We're here to look at one of the great aspects of FFXIII-2: the monster taming and infusion system.


This system is deep and complex, but not in the off-putting way that the plot is. The amount of variety and configurability in the monsters that you can recruit to fight alongside Serah and Noel is astonishing, which is nice because those two are somewhat lacking in that department. Their development paths are fairly linear. There are a few choices about what strengths to give them as they level up in the "crystarium," but it's mostly a matter of ordering the abilities they learn and doesn't make much difference in the end. The monsters, on the other hand, allow for huge variations in development that results in a system with fascinating choices for optimization and prioritization. Figuring out how to capture and develop powerful monsters early in the game is great fun, and its this characteristic of Final Fantasy games—of finding ways to build a strong party early in the game without tedious grinding—that I really enjoy.

On a totally different note, I've been considering different ways to practice using databases and building simple websites, and the monster taming system is complex enough and interesting enough that it would make for a good collection of content to use for that practice while having some fun in the process. So, the other goal of this series, other than exploring the monster taming system in FFXIII-2, is to explore how to get a data set into a database, put it up on a website with Ruby on Rails, and experiment with that data set in some novel ways. Before we get into all of that, however, we need to understand what the heck we're putting in the database in the first place, and to do that we need to understand this monster taming system in detail.

Monster Taming

Okay, what is this monster taming, and why is it so complicated? We'll have to start at the beginning and work our way through the system. At the start of the game there's just Serah, trying to stay alive. (Actually, the very start of the game is a flashy battle sequence and confusing plot points with Lightning, but let's ignore that.) Pretty soon Noel shows up and decides to help Serah out, so now it's a party of two. This setup goes on for a couple levels, but it's pretty weird for a Final Fantasy game. Normally there's three or four characters in a party. Then we come to a pitched battle with a Cait Sith and a Zwerg Scandroid. There will be a lot of weird monster names throughout this series. You're just going to have to roll with it. Anyway, after creaming the cat and the droid, they turn into monster crystals, which are basically the essence of monsters. These crystals are stored in your monster inventory, and you can assign three of them to coveted spots in your "Paradigm Pack" (not the name I would have picked). These three monster spirits will fight with you in battle, and so begins your long and precarious journey as the monster whisperer.

Monsters come in six basic varieties, conveniently matching the six roles that Serah and Noel can assume. These six role are briefly explained as follows:
  • Commando - The Arnold Schwarzenegger role, plenty of strength, short on finesse.
  • Ravager - The mage role, uses attack magic.
  • Sentinel - This is a tank role, not many attacking options, but it absorbs damage like it's nothing.
  • Saboteur - Weakens the enemy by removing protections and inflicting ailments like poison and slow.
  • Synergist - Strengthens the party with offensive and defensive enhancements. Also moonlights as a business executive.
  • Medic - Heals the party, and possibly the only obvious role name of the bunch.
While Serah and Noel can switch between these roles, the tamed monsters have fixed roles. Switching the monster's role switches the monster, and there are three role possibilities for any given battle corresponding to the three monsters that are on deck. The monster's type is only the beginning of what a monster is, though. There is so much more.

Monster Training

Monsters can gain experience just like Serah and Noel. Both the humans and the monsters have crystariums where they advance along a path to gain abilities and increase their stats. While the humans have a crystarium for each of their six roles, the monsters each have one crystarium, possibly with multiple levels, where they gain their abilities and stats. Because the crystariums of the monsters are more unique to the monster itself, each monster type will learn a unique set of abilities and end up with different stats. Additionally, while the humans can move through their crystariums by spending crystarium points gained from winning battles, monsters can only advance on their crystariums by using various types of monster materials that are dropped by defeating monsters in battle. This seems to be some form of cannibalism, but it's pretty mild because the materials are bolts and orbs and other things like that. Monsters require different materials for their crystariums depending on what level they're on their crystarium, and if they're biological or mechanical monsters. Different materials will also give different bonuses to the monster's health, strength, magic, or all three stats.

Following so far? Because we're just getting started. This monster whispering is intricate stuff. On top of the unique upgrade paths, abilities, and materials, each monster spirit has a set of characteristics that relate to how they will develop as they level up. A monster can be a "late bloomer," meaning it may be weak to start with, but it can reach the upper levels 70-99 of its crystarium. Maybe the monster is "brainy," meaning that it will learn lots of abilities, or it's "flameproof," which is pretty self-explanatory. There are 29 characteristics in all, and any given monster can have up to four of them. Monsters will also come with some initial abilities, whether that be actions like casting certain spells and attacking or passive abilities like "armor breaker" that allows it to penetrate an enemy's physical defense. Taming and training monsters are not the only ways to get monsters with certain abilities, however. This is where things get real, as in real complicated.

Monster Infusion

The third way to give a particular monster new and wonderful abilities is to take another monster that has the desired ability(ies) and fuse them into the desired monster through a magical monster infusion process. How does this work exactly? Who knows! How did materia work in FFVII, or guardian force cards in FFVIII? It's a Final Fantasy game; some things you just have to accept without question and move on. The source monster spirit is lost in this process of infusing the target monster with new abilities. It's a destructive process.

Losing the source monster is not the only cost, though. There are restrictions as well. The first restriction is that a monster can only have 10 passive abilities. If a monster accumulates more than 10 passive abilities, some of them are going to have to go. These abilities all have a rank, and higher ranked abilities will stick to a monster better than lower ranked abilities. Also, newer abilities are stickier than older abilities, according to when the monster learned them. The lowest ranked abilities will get the boot first, with order of acquisition being the tie-breaker—first in, first out.

The next restriction is red-locked abilities. These are abilities that cannot be transferred to or removed from a monster, ever. This restriction is pretty simple, unlike the next one.

Monsters can also have yellow-locked abilities, although these locks never exist by default. Yellow locks can be created, propagated, and destroyed by infusing abilities of the same type in various ways. Two abilities are the same type if they modify the same attribute. For example, HP +10% and HP +25% would be of the same type. Also, HP +10% is a lower rank than HP +25%. That's important for yellow locks because if you infuse a monster that already has a lower rank ability with an equal or higher rank ability of the same type, the infused ability comes with a yellow lock and will stay put when the monster's abilities overflow. Generally, if an ability of higher rank is added to a yellow-locked ability of lower rank, the yellow lock is kept. If an ability of equal or lower rank is added to a yellow-locked ability, the yellow lock is destroyed. It's a bit more complicated than that because there are about a dozen different combinations, but this summary should be sufficient for the purpose of setting the requirements of the database. Basically, we want to make sure we know the rank of each ability so that we can figure out the best way to develop monsters' abilities.

All of the red lock and yellow lock stuff has to do with passive abilities, but there are two other types of abilities that come into play with monster infusion: role abilities and hidden abilities. Role abilities are the actions that the monster will take in battle, and there is no limit to the number of these abilities that a monster can have. When a source monster is infused, you can choose from its role abilities up to the number that its crystarium stage is at, which will be 1-5 depending on how much you can level up the monster and how much you actually leveled it up. The disadvantage of infusing too many role abilities on a monster is that you don't have control over what it does in battle, and if it has too many options, it probably won't be doing what you want it to do when you need it most. Decide what you're going to use a monster for, and then don't give it choices. You can't remove role abilities once they're infused.

Lastly, hidden abilities are learned by a monster when it is infused with 99 levels worth of monsters of the opposite role. Commando and Ravager are opposites (makes sense), Saboteur and Synergist are opposites (makes even more sense), and Sentinel and Medic are opposites (the leftovers, I guess). For example, you could infuse nine level 17 Zwerg Scandroids onto your Red Chocobo, and it'll learn Jeopardize, which boosts the bonus the chocobo gets when attacking a staggered enemy. Each role has it's own hidden ability that it gets when those 99 levels of monsters of the opposite role are infused into it.

Acquiring the Data for the Database

Okay, that was a bunch of intricate, complicated stuff, but it gives us a good idea of what kind of data we want to put in our database so we can link it up and ask interesting questions about monster infusion. 

First, we want to know all about monsters:
  • What's its name?
  • Is it tamable? We might have a separate tamable monster table since most of the following properties wouldn't apply to non-tamable monsters.
  • What materials does it drop in battle?
  • What's its role?
  • Where in the game can we find it?
  • What are its characteristics?
  • What's its max level?
  • What are its starting and ending stats (HP, strength, and magic)?
  • What are its starting abilities?
  • What abilities does it learn and at which crystarium levels?
  • How many crystarium stages does it have?
  • What is its feral link? (We didn't talk about this. It's a special action that can be triggered when the monster gets hit too much.)
  • What does the feral link do?
  • We could also include pictures if we want to get fancy.
We also want to know about abilities. This will be a separate table:
  • What's its name?
  • What's its rank?
  • What does it do?
  • Is it passive, role, or hidden? These may be separate tables, since they're different enough to warrant it.
  • Which role is it associated with?
We'll be interested in at least one aspect of the areas in the game:
  • What's its name?
  • How early can we reach this area? I.e. which area unlocks this area?
Since there's a fair number of monster materials, we'll want to keep track of those:
  • What's its name?
  • Is it biological or mechanical?
  • What stage of the crystarium is it for?
  • Does it boost HP, strength, magic, or all three? (The name does give this away, but let's be thorough.)
We'll also want to know a little about the monster characteristics because the names are not self-explanatory:
  • What's its name?
  • What does it mean?
This is shaping up to be a reasonably complex database with 5-8 tables interlinked by these different items' names. The relations in the database will happen through IDs, but everything does have a name as well. The names will be what appears in the tables presented as views of the database, likely with hyperlinks to their information in their own tables. So how should we get all of this data into a database? I certainly don't want to enter it by hand. There's over 150 monsters, dozens of abilities, and dozens of properties for each monster. 

Luckily, some ambitious people have already done the hard work of writing out all of these things in an FAQ, and it's available on gamefaqs.com. The Monster Infusion FAQ by sakurayule, BMSirius, and Taly932 contains almost everything we want to put in the database. It also contains example builds for post-game super monsters, but we're going to look at something a bit different with this series. We want to figure out the best monster builds we can do during the game in order to have monsters that can help us through the game without the need to do any grinding. All of the necessary information is in that FAQ. We just have to write a script to parse it and put it in a form that's easy to import into the database. That parsing script is what we'll figure out how to write in the next episode.

Thursday, March 19, 2020

COZY FAMILY HOUSE + DOWNLOAD + TOUR + CC CREATORS | The Sims 4 |


Continue Reading »

July Scrum Rnd2 - Madrak2 Vs. Baldur1


Last night I got my round two of the July Scrum league in vs. Jordan and he was kind enough to allow me to pause the clock between rounds to take a picture to write a detailed report.  I am extremely excited to be writing this match up because it was one of the best kinds of game: it swung wildly back and forth, with the game ending on Turn 7 with me at 40 seconds and Jordan at 30 seconds.  I'm very grateful to Jordan for the match and look forward to other matches in the future.

Jordan's Lists

Baldur1 Bones of Orboros
-Megalith
-Wold Guardian
-Woldwarden
-Woldwatcher
-Woldwyrd
-Woldwyrd

Stoneshaper
Stoneshaper
Stoneshaper
Blackclad Wayfarer
Sentry Stone & Mannikin
Shifting Stones
Celestial Fulcrum

Kaya2 - No Theme
-Laris
-Feral
-Gnarlhorn
-Warpwolf Stalker
-Argus
-Druid Wilder
Feralgeist
Lord fo the Feast
Reeves of Orboros (min)
Shifting Stones + Stone Keeper
Tharn Ravagers (min) + Chieftain

Matchup Analysis

So it's a Bones list and Kaya2 out of theme, my initial thoughts are "look at the stones on this guy!".  Trolls have always been a bit of a bad matchup for Circle in the game and it seems immediately obvious my drop is going to be Madrak2 and Jordan will be forced into Baldur1.  Simply put both of my lists can run over Kaya's list without breaking a sweat, particularly Grim2.  Conversely out of the two I'm probably better off with Madrak into Baldur.  This is exactly what happened, Jordan didn't even bring his Kaya list with him when he arrived to play our game.

For reference my Madrak2 list is:

Trollblood - Madrak2 Toughallo

Theme: Band of Heroes
3 / 3 Free Cards     74 / 75 Army

Madrak Ironhide, World Ender - WB: +28
-    Trollkin Runebearer - PC: 0
-    Dire Troll Mauler - PC: 15 (Battlegroup Points Used: 15)
-    Dire Troll Bomber - PC: 19 (Battlegroup Points Used: 13)

Fell Caller Hero - PC: 0
Eilish Garrity, the Occultist - PC: 5

Krielstone Bearer & Stone Scribes - Leader & 5 Grunts: 9
-    Stone Scribe Elder - PC: 3
Trollkin Long Riders - Leader & 4 Grunts: 20
Kriel Warriors - Leader & 9 Grunts: 11

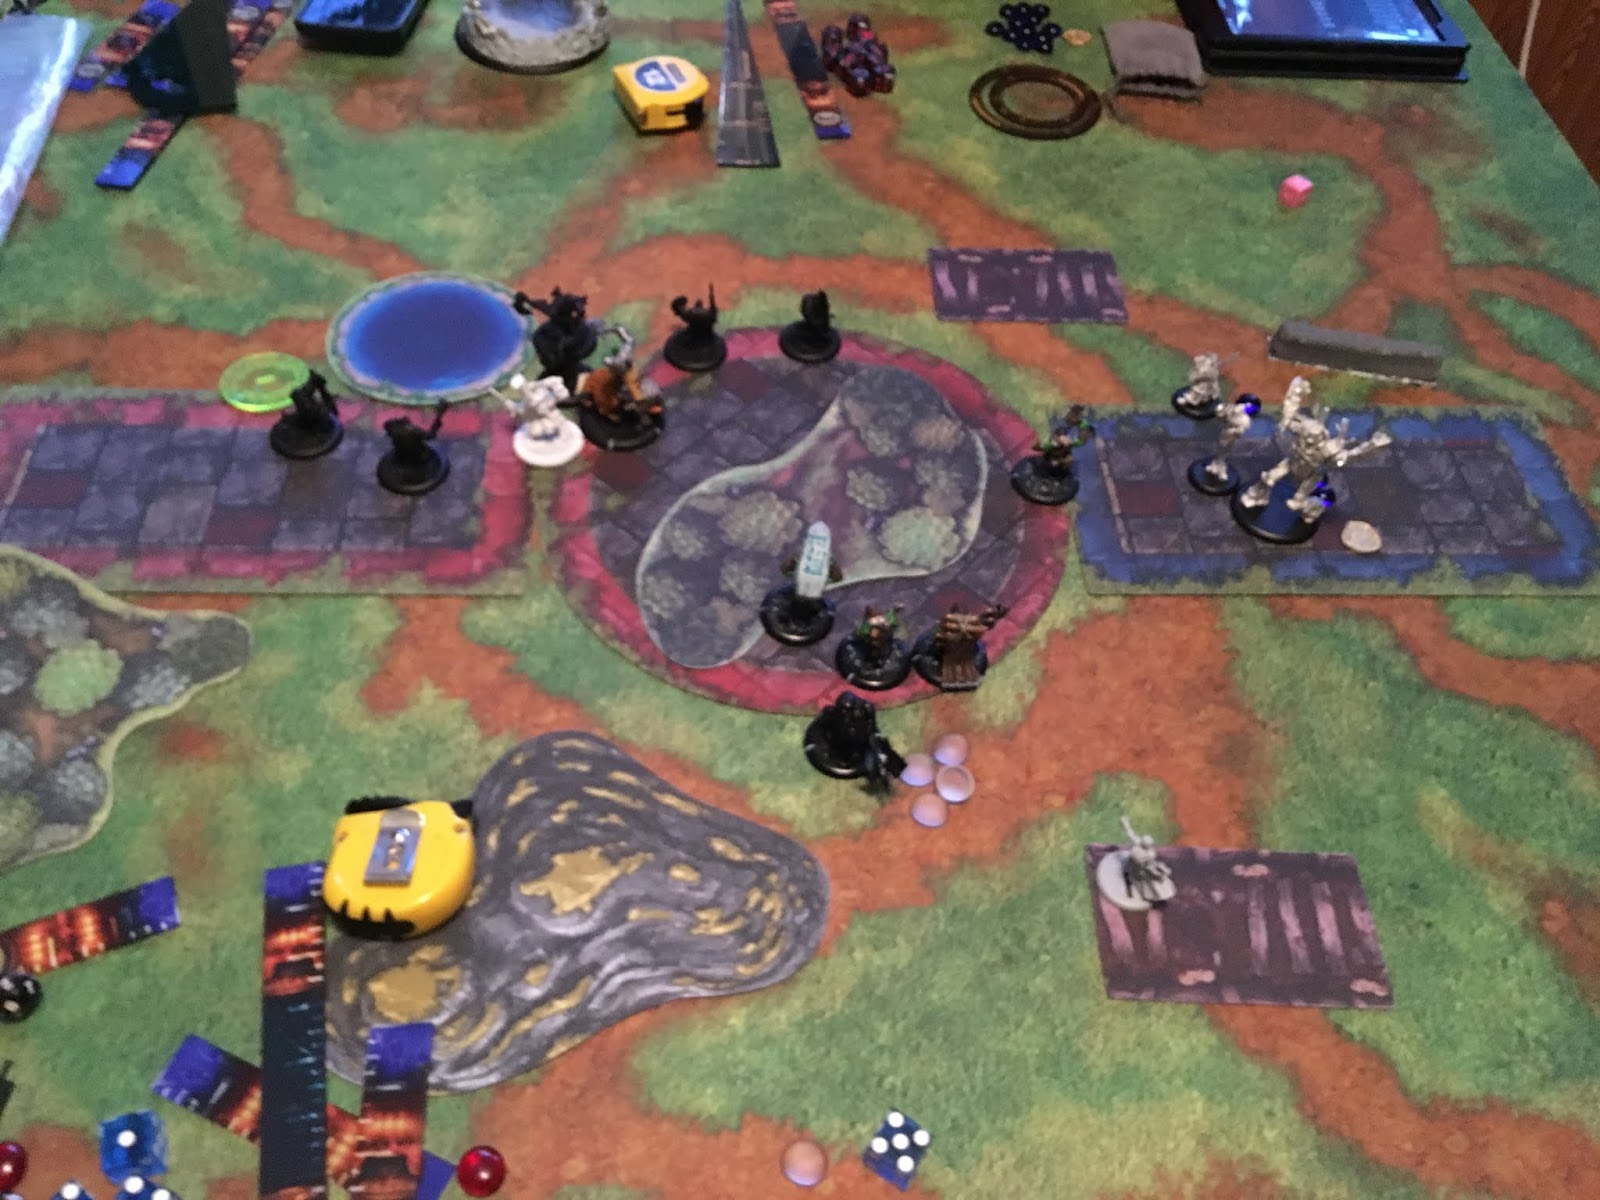
Our Scenario was The Pit 2.

Deployment


I wont the roll off to go first and Jordan picked his table side. Since we both had an extra 2" of deployment we were starting off really close to each other.

My Turn 1


I respected the output of the Woldwyrds to murder Longriders with Blood Fury on them, so I simply dump all my Fury onto the stone and run forward, keeping everything except one Long Rider under the aura and sing for no continuous effects.

Jordan Turn 1


Since I had zero chill, Jordan was forced to feat turn 1.  This sees him kill a Longrider from my left flank with a Woldwyrd, Fulcrum, and Woldwatcher finally finishing it off and creating a forest out of its corpse. On the right flank Jordan takes some Geomancy shots at my Longriders doing minimal damage, but he makes a mistake by running the Manikins to jam before taking his shots with the Woldwyrd.  He misses my Longrider and kills his Manikin furthest to my right.

Of note - I forgot to deploy Eilish and Jordan was kind enough to allow me to put him at the back of my lines, so I had him hide in a trench.

My Turn 2


After some careful measurements, I am able to get one Longrider over the wall and into the Woldwyrd on my right flank and one Longrider can engage it over the wall - all without entering Baldur's control area.  Madrak puts Bloodfury on the right most Longriders and then fills the stone, sitting on 1 after a Harmonious Exaltation. I was careful to stay more than 2" from the forest, respecting Baldur's assassination.

The Fellcaller gets puppet master from Eilish and then activates (after the stone!) and sprays off one of the Manikins to clear my charge lane, and then sings Pathfinder on the Longriders (they were out of Baldurs feat). Luckily I do no damage to my Longrider.

I'm able to kill the right Woldwyrd with the Long Riders and while I am able to get a single rider to the Sentry stone, it leaves it on one box.

On the left flank I call pathfinder to allow the Longriders to shift left and I'm able to just toe my Bomber into Baldur's forest to see through to the other side to kill a Shifting stone. Jordan shield guards the first shot, but the second shot is able to kill a stone and take teleportation off the table.

Jordan's Turn 2


Jordan decided that murdering Trolls was his fucking job and it was time to go to work. The left Woldwyrd shifts right and shoots two Longriders off the table thanks to them having an upkeep on them. The Blackclad gets hunters mark on the unit and then Megalith and a Woldwarden decide to kill the other riders, with more than enough fury to Earth Spikes and knock down the right Fell Caller, then kill my Runbearer, with his crit knocking down Madrak, my left Fell Caller, and a Kriel Warrior.

Jordan uses his still alive Sentry Stone to make a Manikin who then sprays down part of my Krielstone. He then runs and Jams up my stuff with shifting stones and the Woldguardian has the +2STR/ARM spell on it (which I forget about).

To top it off he's also able to kill two more Longriders from my left flank with his Fulcrum and the Watcher, scoring 1 point.

Overall, I'm astonished I'm still able to sit comfortably as I write this after the ass beating Jordan laid down here. Suffice it to say I didn't at all expect to lose nearly that much. On the plus side, Jordan was not able to kill my objective and score more than 1 VP.

My Turn 3


My initial plan was to have the Longriders and Fell Caller kill the Woldwarden, the Mauler kills Megalith, and then the Bomber kills the Woldguardian. Simple, right? Turns out this was less simple and more of a "I'll try to do too much and as a result accomplish nothing for $500, Alex."

Since my Runebearer was dead, I should have noticed my plan was utterly doomed to failure since I couldn't upkeep Blood Fury and so would need to cast it and then two Rage's to properly achieve my goals. I similarly couldn't actually charge the Woldguardian and so would need Madrak's feat to et into him, burning 1 attack off the Bomber. I also forgot the Guardian had the +2 ARM spell.

Madrak stupidly goes first, sacrificed movement to stand, feats, then throws his axe to kill the Manikin in the Longriders way.  I put Bloodfury on the riders, and then Rage on the Bomber.

My left Fell Caller sacrificed action to stand and then walks 5" and calls to stand up the other Fell Caller.  Eilish gives that Fell Caller puppet master (another mistake, it should have gone on the Mauler). The Stone activates for +1 STR, and then the right Fell Caller charges into the Warden, doing decent damage and not even needing the Puppet Master.

The Longriders charge and impact attack and I kill it between two impact attacks and one charge attack, they Reposition out of the Maulers way.

The Mauler is dice off 2 from Megalith since he didn't have Rage and I decide the extra attacks are better.  I charge in, missing my second initial and losing the chain attack. I proceed to roll a bunch of 5's for damage and leave all of Megaliths systems up.  The Bomber similarly fails to do too much to the Woldguardian, though he kills two Stones for my trouble due to Feat.

On the bright side my Kriel Warriors with near zero buffs on them decide to charge in and utterly annihilate the Woldwatcher.

If I wasn't hell bent on making mistakes I would have Jammed up the Woldguardian with 2-3 Kriel Warriors and used the Bomber to possibly kill the objective and if I had enough Kriel Warriors left maybe I score a point by killing the Woldwatcher anyway.  Rage and Puppet Master goes on the Mauler who would then murder Megalith and then I'm way ahead on the piece trade and at least tying scenario.

Jordan Turn 3


If you remember Turn 2, you'll know that Fucking Murdering Trolls is Jordan's job description.  Megalith gets +2 STR from a Stonekeeper and walks to be able to kill the Mauler and hopefully kill the Objective.  Luckily for me he has to focus everything on killing the Mauler and isn't able to kill the Objective.  I pulled the 5 Fury off the Mauler when it dies.

The Sentry Stone spawns a new Manikin who then kills my right Fell Caller. The Woldguardian gets an additional +2 STR from another Stonekeeper and trivially murders my Bomber.

The Woldwyrd starts gunning down Longriders, but isn't able to kill them all. In fact he's only able to force a Tough on one rider, who gets charged and killed by a Blackclad who then Battle Wizards to kill some more of my Kriel Stone.

The only area where Jordan didn't completely meet his Troll Murder Quota was with the Fulcrum who only killed a few Kriel Warriors.  The other bit of good news is that no one scores anything on Scenario this turn, so I'm only down 0-1.

My Turn 4


This turn I finally decided that Sticks and Stones have broken enough of my bones and the best way to make them never hurt me again is to annihilate them.

Madrak upkeeps Bloodfury on the single Longrider.  The Fell Caller activates and puts +2 MAT on the Krielstone unit.  The Stone spends a fury for +1 STR and then declares a Charge/Run to kill the goddamn Blackclad who sprayed them down.

The Longrider has similarly had enough of the shit out of the Woldwyrd and Sentry Stone. I charge the Woldwyrd and am able to get impact attacks on both the Woldwyrd and the Sentry Stone. The Sentry Stone dies and I miss the Woldwyrd with my impact.  I roll like goddamn FIRE on the charge attack and leave it on like two boxes. Madrak activates, casts Blood Fury on the Kriel Warriors.

The Kriel Warriors decide to continue to be bosses, two charge the Stonkeeper and CMA to get a hit and kill him.  The others charge into the Woldguardian, and then rip it to shreds. I'm able to redirect a charge attack into the Woldwyrd, I hit, and then take the last points off.  As such I score the center zone.  Score is now tied, 1-1.

Jordan's Turn 4


Here is where things start going bad for Jordan.  He's only able to kill a few of the Kriel Warriors, notably failing to clear the left zone and score due to dice keeping one contesting Warrior alive.

He is able to kill my objective and clear the right zone, scoring two VP's here. He also sacrifices a Stonekeeper to prevent me from scoring the center.  Score is now 3-1 for Jordan.

My Turn 5


Madrak gets his two free Fury from the dead beasts and upkeeps Blood Fury on the Kriel Warriors.  The Stone activates and sings for +1 STR and I move the one model to contest the left zone. He misses the Stone Shaper.

Eilish gives Madrak Puppet Master.  Madrak activates, aims, and boosts to hit the Shaper, killing him and clearing the center zone.  The Kriel Warriors charge into the Fulcrum and carve off damage. The Fell Caller charges in, and fails to kill. The Long Rider has to charge in and is finally able to kill the Fulcrum.  I made a mistake in forgetting to reposition the Long Rider and turn him to face Jordan's models coming into the center zone.

Clock is getting low. Score is now 3-2, sill in favor of Jordan.

Jordan Turn 5

I forgot to take a picture here, though what occurred should be apparent in the next picture.

Megalith moves up and kills the contesting Stone model in melee, then Geomancies and kills my Stone Scribe Elder and the last grunt in the Stone unit, leaving only the Bearer itself. Jordan puts a forest up to block LOS to Megalith who is now contesting the center zone.  Jordan scores my left zone and the score is now 4-2 in favor of Jordan.

My Turn 6


Madrak gets his two fury and upkeeps Blood Fury on the Kriel Warriors.  The Warriors and Fell Caller charge the objective and kill it, with the two Kriel Warriors who couldn't get in taking position to contest the center zone. Madrak and the Stone run to the right zone and I make a critical error, I leave Madrak within 2" of the forest, forgetting about Baldur's threat.

I position the Fell Caller just outside of Megalith's 9" threat.

Eilish decides to sacrifice himself for the cause and contests the left zone. 

I score two points, tying the game 4-4.

Jordan's Turn 6


Jordan decides to go for the assassination I dutifully gave him.  Megalith moves up and then misses Madrak with his Geomancy.  Baldur doesn't upkeep the forest, casts it on himself, then teleports to within 2" of Madrak.  He's got 4 Fury.

He boosts to hit Madrak (3 Fury left) and hits, but I sacrifice it to the Stone, who suffers the Weight of Stone effect, and then decides to pass his Tough check. Baldur buy's the attack on the stone and kills it (2 Fury left).  He buys on Madrak again (1 Fury left), misses, and then he decides to camp his last Fury.

I score on Jordan's turn, bringing the game 5-4 in favor of me.

My Turn 7


Given that I'm under two minutes on clock, I decided to avoid the assassination and just play it safe. Fell Caller gives +2 MAT to the Kriel Warriors who charge into Baldur, one hits doing 8 damage. More importantly they get within 3" of Madrak who runs away from Baldur, taking the free strike and then killing the Kriel Warrior because Grim Salvation lets you sacrifice even free strikes.  I run to the other corner of the zone thinking there's no way Baldur can get to me and that's game.

What I should have realized was that he could teleport to me again and that to cement the game I could just surround Madrak with Kriel Warriors to really make sure I can't die, but I just try to put them in the way.

Still, I score yet another VP for the left zone and bring the score to 6-4, thinking I've won the game. I clock back to Jordan with only 40 seconds left on my clock. I didn't even activate the Longrider.

Jordan's Turn 7


Jordan decides to pull yet another Surprise Motherfucker! He teleports Baldur to Madrak and I think I've lost the game. Baldur is down to 4 Fury for this assassination run.

He boosts to hit Madrak and hits (3 Fury left). He rolls a 5 for damage, Madrak takes 2.  Jordan proceeds to buy his next three attacks and after everything is said and done his damage rolls are so poor that Madrak is left with 10 health when Baldur is out of fury and only 30 seconds left on his clock.  Jordan does run to contest, leaving the score 6-4 and I win by scenario at the end of turn 7.

Conclusions

This game was insane! I managed to survive two assassination runs, and while that's normally not very surprising with Madrak2, in these situations it is very surprising.  Dice saved my ass when I made two mistakes that gave Jordan two assassination runs I didn't have to give him.  I also was able to recover from a critical set of mistakes on Turn 3 on my part and the late game idea of weapon master Kriel Warriors really came through.


Clock was extremely tight and was definitely forcing us to move very quickly so that's definitely a factor towards the end of the game where possibly better decisions could have been made. Still, I won this game through a series of critical dice rolls: Jordan failing to kill a contesting Kriel Warrior on Turn 4 was massive, and then my passing the tough check on my Stonebearer on  his Turn 6 assassination run ate through enough of his fury to keep me alive.

Overall it was an incredible game, the kind that really makes you appreciate Warmachine.  I look forward to playing Jordan again.

My conclusions going forward is to take notice of exactly how fucking good higher model count lists are in scenario. I remember that from the last Scrum in 2017 and it seems just as true today.  Looking forward and knowing that I want to play Convergence, primarily in Destruction Initiative, I'm going to start having the kinds of large attrition swings in my games if I can't mitigate my opponents.  The model count and unit buff on the late game Kriel Warriors really saved me here.  I'm going to need to keep that in mind as I move forward.

Networking And Computation: Technology, Modeling And Performance, 2Nd Edition - Fox eBook

Networking and Computation: Technology, Modeling and Performance, 2nd Edition

Monday, March 16, 2020

Forza Horizon 4 - Tips & Tricks | Pro-GamersArena.


As we probably are aware that Forza Horizon 4 is out now for the individuals who pre-ordered the upgraded version of the game, and it'll be out in full for everybody on PC and Xbox one week from now. So in this Forza Horizon 4 control, we'll be strolling you through the entire rundown of fundamental tips and tricks which you have to know going into the game. What's more, let me disclose to you Forza Horizon 4 is right now the best open world racer game made in these couple of years.

Forza Horizon 4 Tips & Tricks :

How to Unlock Fast Travel Anywhere in Forza Horizon 4.


Driving anyplace in Forza Horizon 4 is gigantic measures of fun as you get the chance to see the excellent open world, incredible taking care of and lovely autos, at times you simply need to get some place in a moment, deserting all the mission that is going on. 

Ideal from the beginning of the game you can quickly make a trip to occasions and different spots of intrigue you've found for a cost (except if you've discovered the majority of the quick travel sheets, at that point it's free), yet to quick travel totally anyplace, you have got some work to do. 


Picture of location of Fairlawn Manor 
With the end goal to open the capacity to movement quick anyplace in Forza Horizon 4, you have to buy a reasonably costly home that is toward the south of Edinburgh. 

Fairlawn Manor will cost you like 2,000,000 credits, which means you most likely wouldn't get it until you've made a not too bad scratch into the game. Yet at the same time it merits doing , as it empowers you to movement quick completely anyplace on the guide, or, in other words. Particularly once you've discovered all the quick travel sheets so it turns out to be allowed to utilize. Purchasing Fairlawn Manor additionally grants you with 10 Super Wheelspins, or, in other words, and a Silver Top Hat for the individuals who get a kick out of the chance to dress their symbol up in style. 

How to Download DLC Cars in Forza Horizon 4.

In the event that you've acquired a unique release of Forza Horizon 4, or on the off chance that you claim the auto go for game, at that point you may consider how to get your hands on a portion of those superb elite DLC vehicles, similar to the James Bond autos. To get to a rundown of DLC autos in Forza Horizon 4, you'll right off the bat need to make a beeline for either the primary Festival Site amidst the guide, or a House. 


With the end goal to buy the autos, first you need a houses and they are not difficult to establish, you simply need to continue seeking them on maps while driving around, and once you've discovered a House, you'll at that point have the capacity to buy it utilizing CR (despite the fact that they're normally entirely costly, which means you presumably wouldn't purchase until you've made an OK gouge into the game.). Either visit the Festival Site in Forza Horizon 4, or visit a house you've acquired, and you'll have the capacity to see a rundown of all the accessible DLC autos that you can download.


There's one thing you have to remember that while the vast majority of the DLC autos in Forza Horizon 4 are accessible for nothing once you've acquired their comparing development packs, some will cost you CR to get. These are typically the more first class autos, similar to the James Bond Aston Martin DB10, in which case you'll need to get out on the streets and procure some CR through races and different occasions. 

This may be the finish of our initial Forza Horizon 4 guide for the time being, however there's bounty more to cover on the game presently. We'll be refreshing this guide at a later date, when we reveal any extra subtle elements in the game.

Till then keep sharing and tell your friends too, to "ENTER THE PRO-BROS ARENA"

Sunday, March 15, 2020

Hiring: Tools Programmer


Title: Tools programmer
Focus: Engine
Type: Full-time, permanent
Last day to apply: 30th of October 2018


Tired of the constraints of Unity, Unreal and other big engines? Want to be in control and get down into the nitty gritty of engine coding? Come join us at Frictional Games, one of the few companies that still makes their own tech, and get all up in our HPL engine!

We are now expanding our tech team and looking for a tools programmer who will help make the HPL engine better, prettier, and more intuitive. Your work on the engine will be crucial to the rest of the team, but it will also be seen by our modding community.

The position is full-time and permanent. Ideally we would help you relocate to Malmö, Sweden to be close to our core team, but this is not a necessity.


What will you work on?

As a tools programmer, you will be working together with a small tech team that is mainly responsible for our HPL engine, but also tech support for the games.

Here are some of the things you will find yourself working on:
  • Creating and maintaining the level editor for our proprietary engine
  • Making intuitive user interfaces
  • Creating small specialised tools
  • Working with low-level systems such as IO, AI, rendering, sound, and physics
  • Working with Xbox and PlayStation versions, as well as possible future platforms
  • Internal support for a team of developers
  • Post-launch support.
We also encourage working outside of your area of expertise, and always learning new things. The more areas of development you are willing and able take part in, the better!

If you want to know more about Frictional work practices, you can check out the introduction posts of Peter and Luis, who will be your closest teammates.


What are we looking for?

You have to be a EU/EEA resident to apply.

The person we're looking for is creative, driven and self-sufficient.

Here are some essential skills we require:
  • Well-versed in C++, C#, Java, or similar
  • Knowledge in AngelScript, Python, Lua, or similar
  • You have created an engine or tools for development for at least one game
  • Strong low-level programming skills
  • Familiar with linear algebra
  • Knowledge in working with Widgets / Custom GUI
  • Fluency in English
  • Skills in team communication and support
  • A Windows PC that runs recent games (such as SOMA) that you can use for work (unless you live in Malmö and will work from the office)
  • A fast and stable internet connection.

These will be considered a plus:
  • Experience in engine development
  • Skills in 3D modelling or texture applications
  • Knowledge in UX design
  • Lover for tech and messing with the low level parts of the engine
  • Excitement for creating fast pipelines and making it easy to create awesome art
  • You live in Sweden.

What do we offer?

We are a small team, which means you will be able to work on a wide variety of things and contribute to our future games in a meaningful way.

We also believe a healthy balance between work and life reflects positively on your work. We offer a variety of perks for our full-time employees, especially who live in or relocate to Sweden. We also don't encourage crunch.

Here's what we offer:
  • Flexible working hours
  • Opportunities to influence your workflow
  • Variety in your work tasks, and ability to influence your workload
  • Participation in our internal game Show & Tell sessions, so you'll have input into all aspects of the game
  • Social security and holidays that are up to the Swedish standards
  • An inclusive and respectful work environment
  • An office in central Malmö you can use as much as you please
  • Fun workmates, game and movie nights, and other outings!

How to apply?

Did the position pique your interest? Are you the person we're looking for? Then we would love you hear from you!

We will be looking at applications until 30th of October 2018.

Please send us your:
  • Cover letter (why you should work with us, what do you bring to the table)
  • CV
  • Portfolio (or links to your works)
Send your application to apply@frictionalgames.com!


Privacy Policy

By sending us your application, you give us permission to store your personal information and attachments.

We store all applications in a secure system. The applications are stored for two years, after which they are deleted. If you want your your information removed earlier, please contact us through our Contact form. Read more in our Privacy Policy.

Friday, March 13, 2020

Learn your market with Alibaba.com’s Industry Reports

Alibaba    
Learn your market with Alibaba.com's Industry Reports
 
Every day, there are thousands of millions of B2B sales opportunities happening on Alibaba.com. Thanks to big data, we have prepared a series of insightful industry reports, so you can get a better understanding of trending business opportunities on Alibaba.com. 
 
Our reports provide you with the following: 
• Market overview of a particular category and its subcategories
• Trends and growth perspectives
• Performance of existing sellers on Alibaba.com
• Buyer profiles and preferences
 
 
Click here to read the first batch of industry reports. More reports are coming soon.
 
Read now
 
CONNECT WITH:
 
My Account|Request for Quotation|Top Selected Suppliers|Contact us
Read our Privacy Policy and Terms of Use

Alibaba.com Hong Kong Limited.

26/F Tower One, Times Square, 1 Matheson Street, Causeway Bay, Hong Kong.

Tel: (+852) 2215-5100

Unsubscribe from this type of email | Set my email preferences

This email was sent from an address used for notifications only and does not give Alibaba any active role,
knowledge or control over the listings. Please do not reply to this message/email.